Certify The Web
Be sure to have the EAB KID and HMAC Key ready for the steps below. See Generate EAB Credentials for more information.
- Download Certify the Web from https://certifytheweb.com/ and install it.
- Launch Certify the Web and click the Settings tab near the top of the window and then Certificate Authorities on the left.
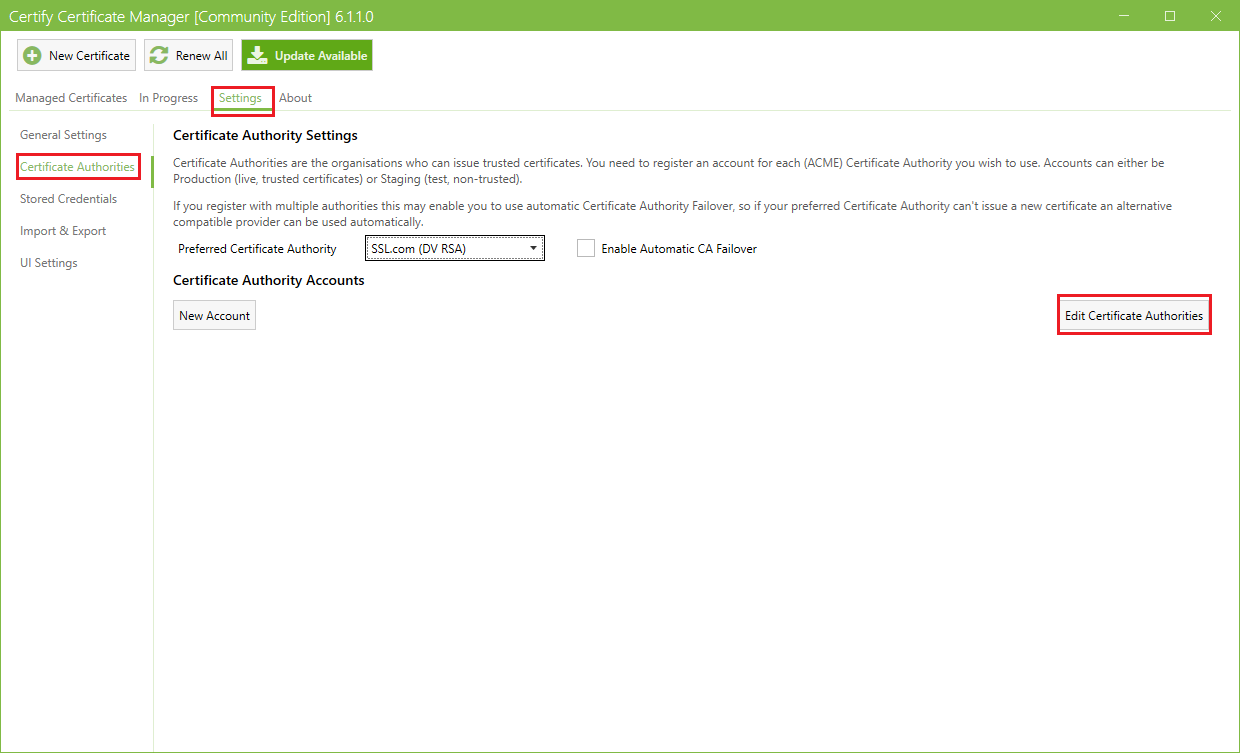
- Click Edit Certificate Authorities.
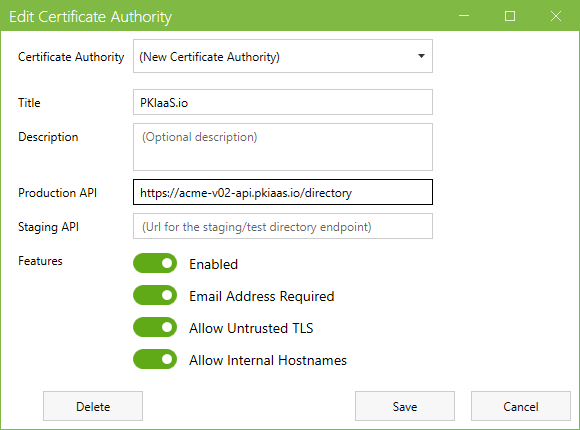
- In the Certificate Authority field, leave “(New Certificate Authority)” selected.
- In the Title field, enter “PKIaaS.io” or something else to uniquely identify the new CA.
- In the Production API field, enter the PKIaaS.io ACME directory URL “https://acme-v02-api.pkiaas.io/directory”.
- Optionally enter a Description. The Staging API field may be left blank.
- Enable all of the options under Features
- Click Save
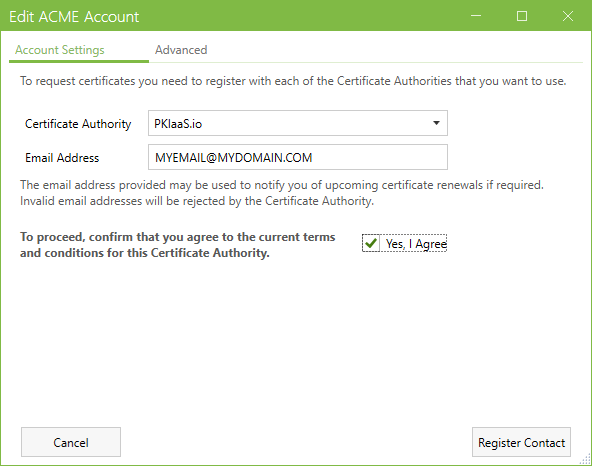
- Click the New Account button on the far left of the Edit Certificate Authorities button clicked in step 3.
- From the Certificate Authority dropdown, select the CA title that was entered in step 5.
- Enter the Email Address to be associated with the new ACME account.
- Check Yes, I Agree to agree to the terms and conditions for the CA.
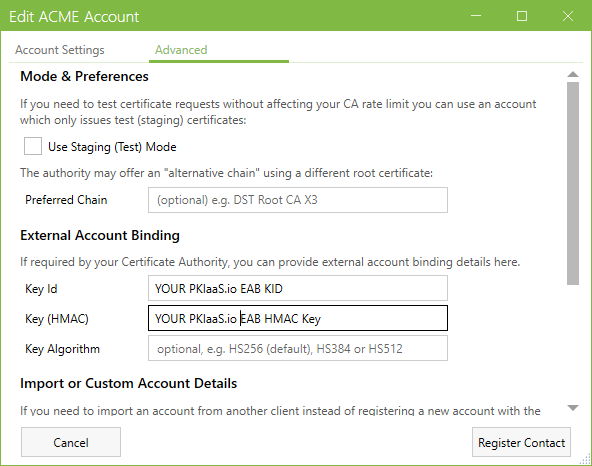
- Click Advanced to enter the EAB credentials.
- Enter the Key Id and Key (HMAC) using the “EAB KID” and “EAB HMAC Key” provided when generating the EAB credentials.
- Click Register Contact.
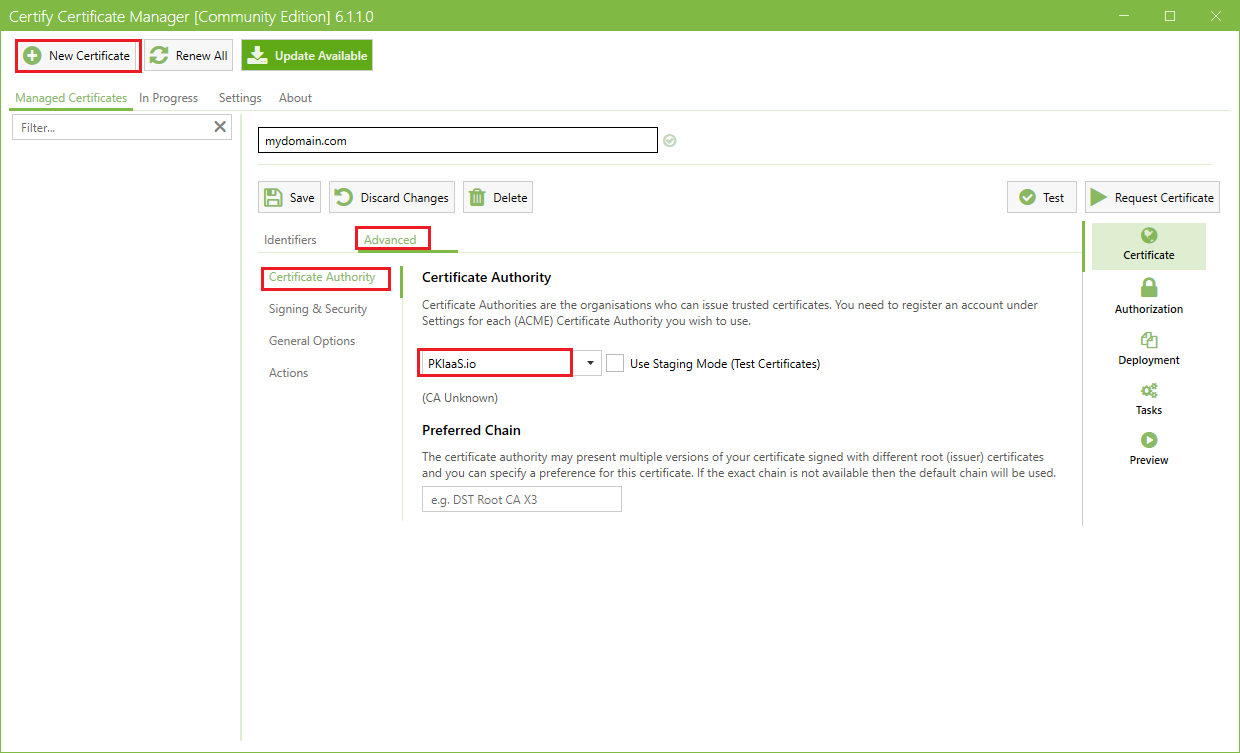
- The ACME account is now registered and ready to requests certificates from PKIaaS.io. Be sure to select the new CA created in step 3 when creating a new certificate request.
See Certify the Web’s Certificate Manager Documentation for more information about Certify The Web.